
![]() Finally after much preparation the nucleus of bees were collected, the best method of getting the bees settled into their new hive was explained and with reassurance that the queen was included, marked and clipped I was on my way home with my new hobby in a box.
Finally after much preparation the nucleus of bees were collected, the best method of getting the bees settled into their new hive was explained and with reassurance that the queen was included, marked and clipped I was on my way home with my new hobby in a box.
The nucleus box is a purpose made plastic Correx pack with ventilation grills and sealed door, the lid was securely taped down, however this didn’t stop me being slightly apprehensive on the drive home!
I was given a tip for transporting the nucleus, that was to keep the width of the frames (length of the box) in the direction of travel, I’m not entirely sure of the reason but it was advised; perhaps something to do with the stopping the frames moving.

With the nucleus safely home I set about placing the hive, tools, feed, smoker and equipment in place in the apiary.
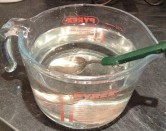
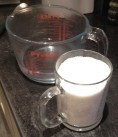 The feed is prepared in advance and is a syrup that the bees will require
  for at least a week or so, it’s a very simple 1:1 mixture of sugar and water; hence 1 cup of water to 1 cup of sugar completely diluted into hot water.
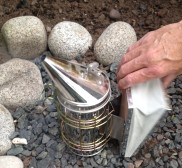
For the smoker I used cardboard as fuel, placed into the grill of the unit and lit; pumping the bellows provides a ‘puff’ of smoke. The purpose of the smoke is to force the bees to eat the honey and therefore calm down – I think the reason is that they think the hive is on fire and need to gather the stores. So it’s best not to use too much smoke.
 I had my wife video the whole experience, she was hidden in the shed next to the hive, I have silenced this due to the panic comments that she made! watch here. (correction this isn’t muted, so just adds to the entertainment)
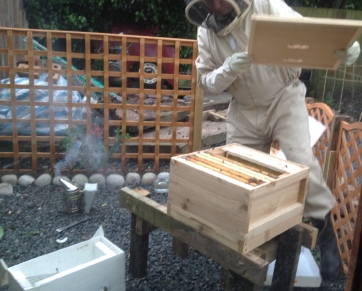
This was my first solo experience with bees; my only other opportunity was on the taster course a few months ago supervised and only handling one frame. I felt reasonably confident; however it is recommended to get a bee keeper with some experience to oversee what you are doing.
 Opening the nucleus lid for the first time, the bees instantly started to buzz around, not so aggressively but with intent and had I not been wearing my gear they probably would have stung me.
My gear consisted of wellington boots, the suit & gloves. Propolis was adhering the frames in place so I needed the hive tool to gently pries out the first frame. Lifting it out of the box I briefly inspected it and every subsequent frame for the queen; I think I spotted her on the third frame however with my inexperience I may be wrong.
Applying a light puff of smoke where necessary the final task was to ‘knock’ and pour the remaining bees into the hive, first checking that the queen wasn’t in there. The aim here is to knock them all into a corner, then firmly, knocking them out of the box and into the hive (easily said than done).

Taking care not to crush any of the bees, I placed the crown board, closely followed by my feed tray.

The feeder is a central holed unit so does not need any crown board modification, the design is such that it only allows access for the bees to go up and through the central port to get to the feed. The surface of the hole is textured to allow the bees to grip the side walls and hopefully not slip into the feed and drown.
Pouring the prepared syrup int the feeder, the bees were accessing the feed within seconds as if trained to do so.
A plastic lid covers the feed tray and the hive lid finally placed on top to complete the hive. I didn’t include the queen excluder frame at this stage as I had been advised that it is unnecessary as the queen will not normally go to get her own food and is actually fed by others, a proper little royal!
Within minutes the hive door was been used and everyone seemed to know their role in the community.
Looking back at the video I needed to add a few more frames and I meant to put the ones that were in there butting up to the 5 frames that came with the nuc.
I also added a shallow bowl of water close to the hive on the floor and floated a flat piece of wood in it to give the bees a platform to land and take on water, we also have a pond with Lilly pads that will also serve as a water source.
Water is not stored by the colony so it is collected and used when needed; to
- dilute honey to be eaten
- mix with pollen to make brood food (70% water) to feed larvae
- dissolve hardened granulated sugars
- cool the hive when temperatures are very high.
I will inspect the hive two days after the install and check the feed levels, add the missing frames and see if queen is visible with too much disturbance.
Having had chance to observe there is good movement in and out and its fantastic to see how they have a defined flight path into the door of the hive, they truly are fascinating to watch.
I would like to set up a web camera to view their activity and this may be a project to undertake very soon.

Pingback: The Bee Diaries – Quick Update & Final Preparation for the Arrival of the Bees. | Prepare to Survive
Great job, Ian! I’m very impressed. I’m scared to death of hornets, so I don’t know if I could do a beehive. Kudos to you for doing this, because I know how important bees are to our world food production. Thanks!
LikeLike
Pingback: The Bee Diaries – Arrival of the Bees – Suplemental | Prepare to Survive
Pingback: The Bee Diaries – Arrival of the Bees – Suplemental | Prepare to Survive | WORLD ORGANIC NEWS